First you have to download Matrikon OPC Explorer from http://www.matrikonopc.es/products/opc-desktop-tools/opc-explorer.aspx
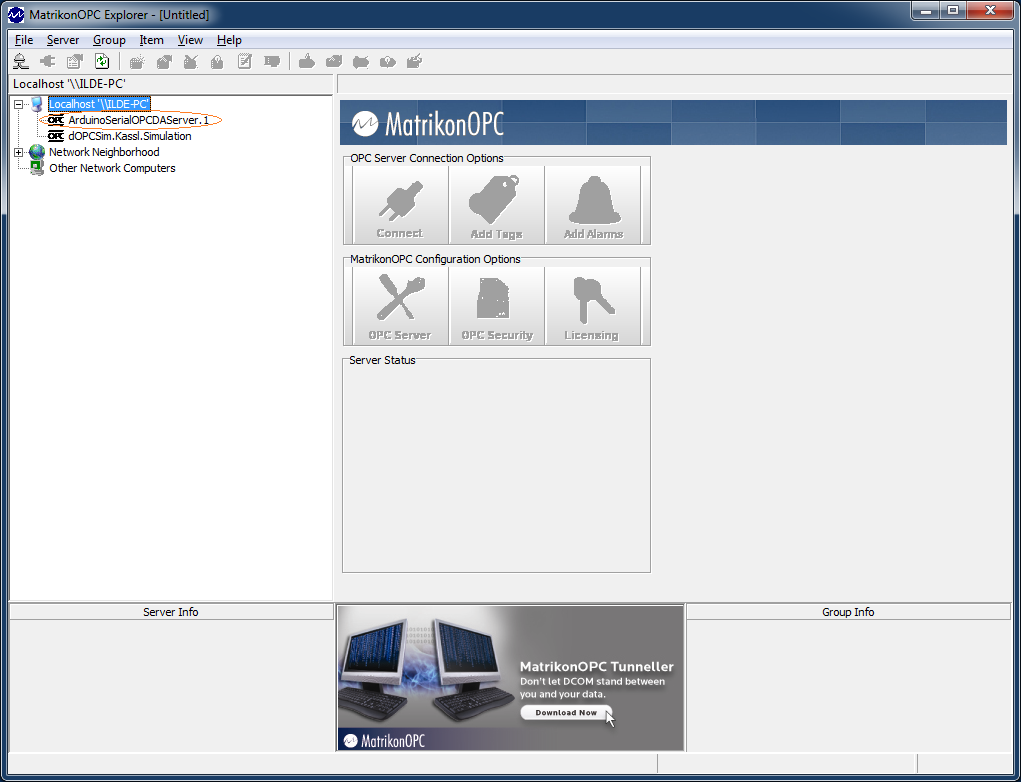
Once installed, execute it and try to browse your Arduino OPC Server.
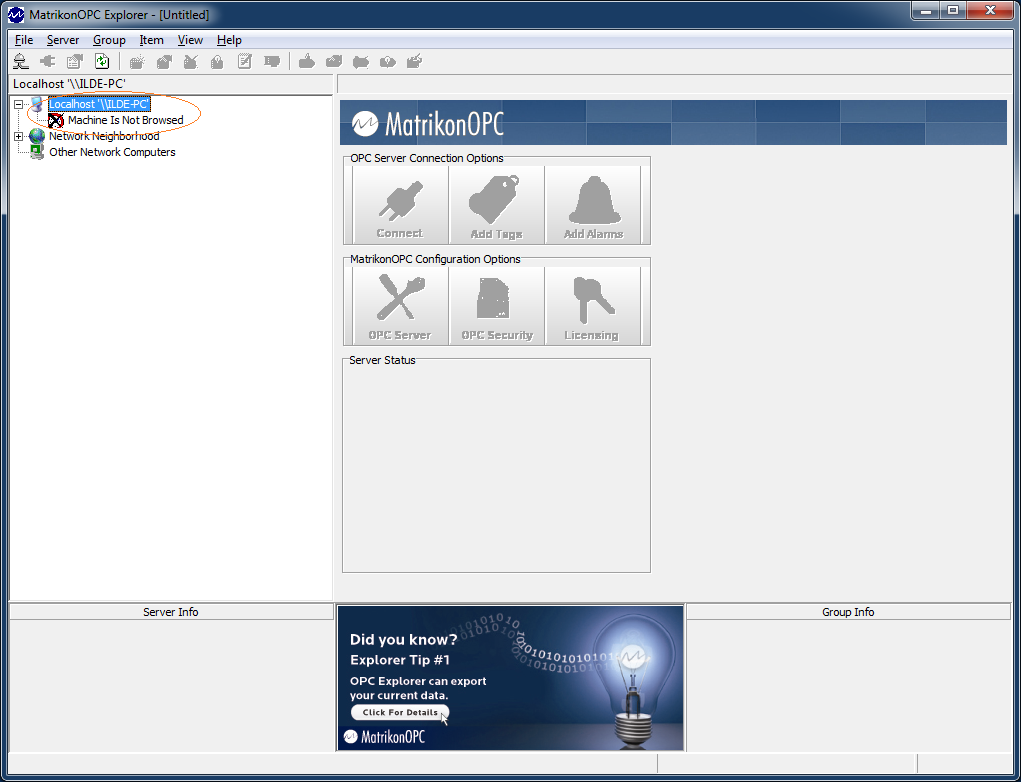
If Arduino OPC Server is not shown then maybe you need to configure Matrikon OPC Server to find it.
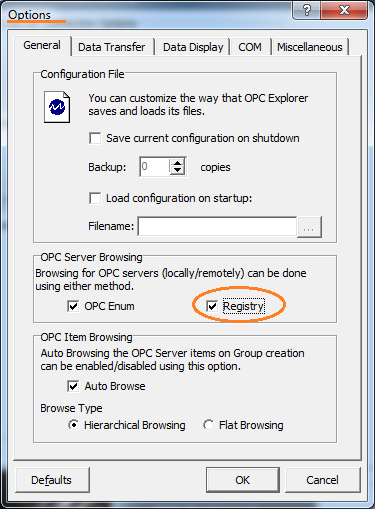
Go to Options and configure Matrikon OPC Server to search for OPC Servers from the Windows registry.
Now you can connect to your OPC Server for Arduino. Remember to configure it adding your Arduino communication COM Port.
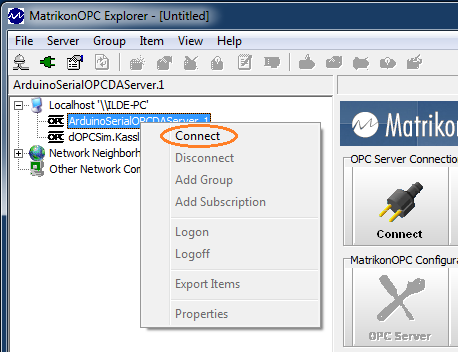
The OPC Server will be launched and will start communicate with your Arduino. Now you can create your items groups.

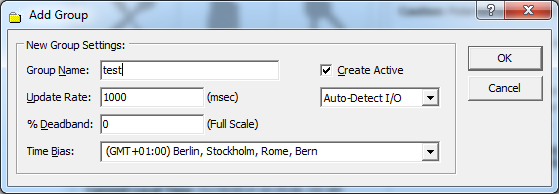
Now you have created your “test” group and now you should add OPC Items to it.
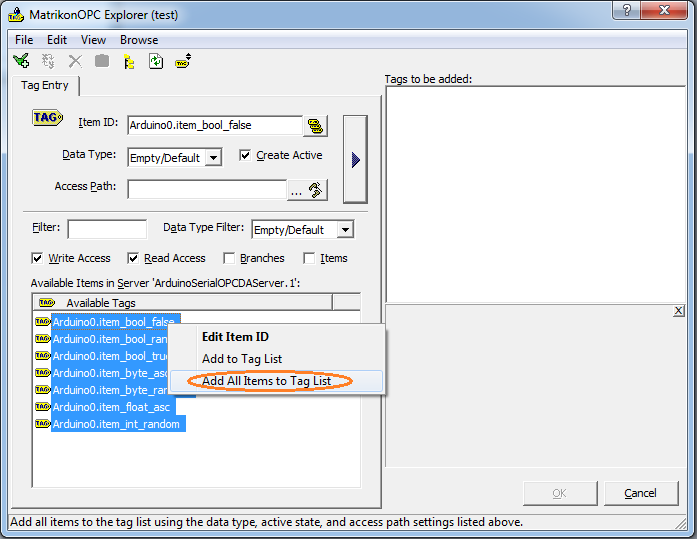
Press right click mouse to get the popup menu to “Add All Items to Tag List” or select only the Items you want.
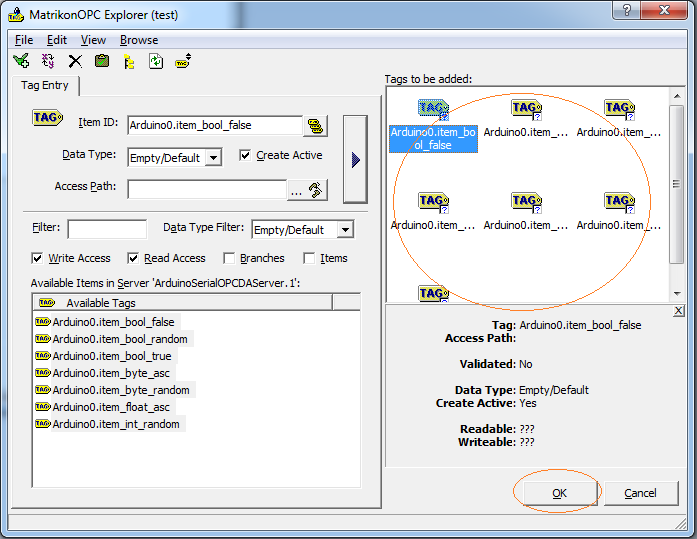
Now you should get all your OPC Items from your Arduino in real time 🙂